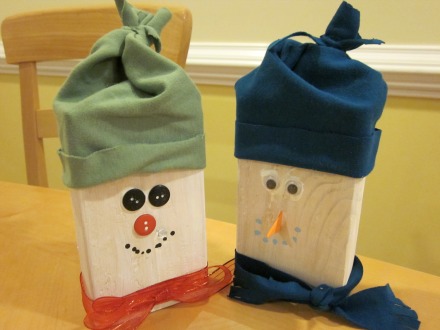
We still have two more days of school here, but I’m keeping the kids busy with wintry baking and crafts. We used some leftover 2X4 pieces to make these cute snowmen!

Our supplies were:
a scrap 2×4
fine sandpaper
white paint, and other colors for embellishment
bits and bobs (googly eyes, buttons, foam, etc.)
scrap fabric and ribbon for hats and scarves
tacky glue
Start by sanding one end of the rough wood (the other side will be covered by the hat.
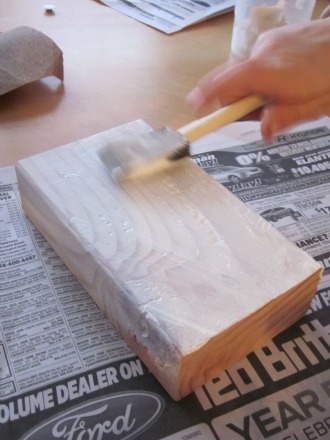
Paint the wood while. I thought it would be easier to take the pieces outside and spray paint them white, so the kids wouldn’t have to sit and wait while paint dried, but then I went outside and thought, COLD! We ended up painting, so it took hours, and they were impatient (gee, wonder where they get that from?).
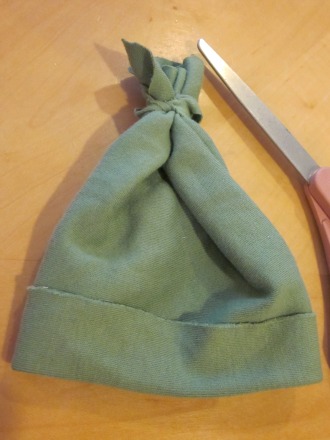
While they played, I messed around with the fabric, just folding and hot gluing to make little hats. If you had an odd sock, you could just cut a tube and tie the top with a ribbon. We just pulled the hat on over the top of the block and hot glued it in place.
Decorate your snowman’s face with buttons, paint, etc. One chose to make a carrot nose that stuck out, using orange craft foam. We used the wrong end of a paintbrush to dot on a smile.
Now we have these cute decorations, and the kids are so proud!
Crystal in Lynden
Tuesday 24th of January 2012
This is great! I've seen these in other people's homes. Thank you for posting a tutorial. This is definitely something my 3 boys and I could accomplish.